


Fast Healthcare Interoperability Resources (FHIR) is the latest standard created by Health Level 7 to address the difficulties around data exchange between different health information systems.
What makes it different from its predecessors is that it adapts to new architectural paradigms and web development technologies. It has been met with great success, as evidenced by its adoption for their interoperability improvement strategies by:
- private companies.
- public organizations
 New HL7 Europe FHIR Implementation Guides to support the European Health Data Space

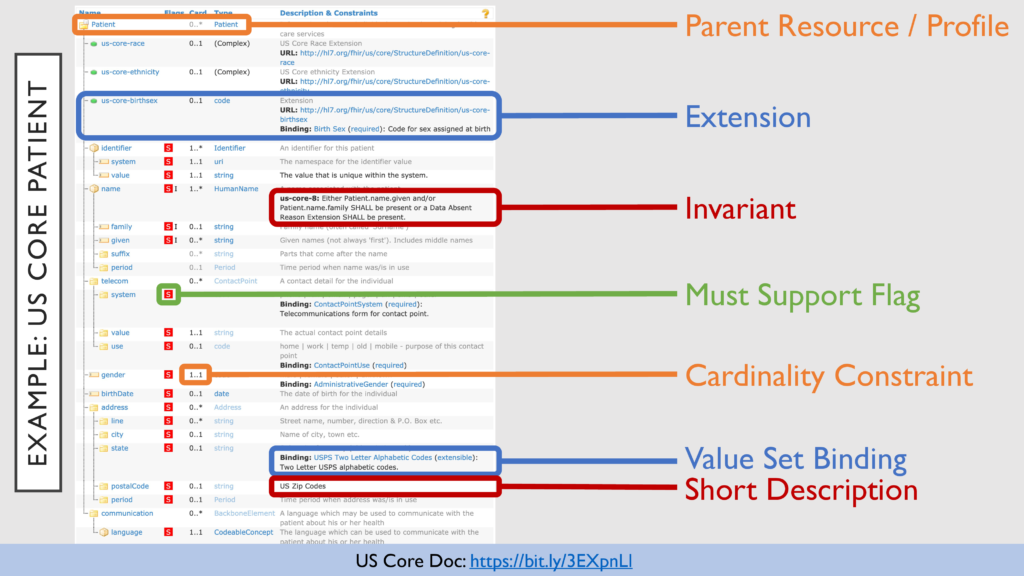

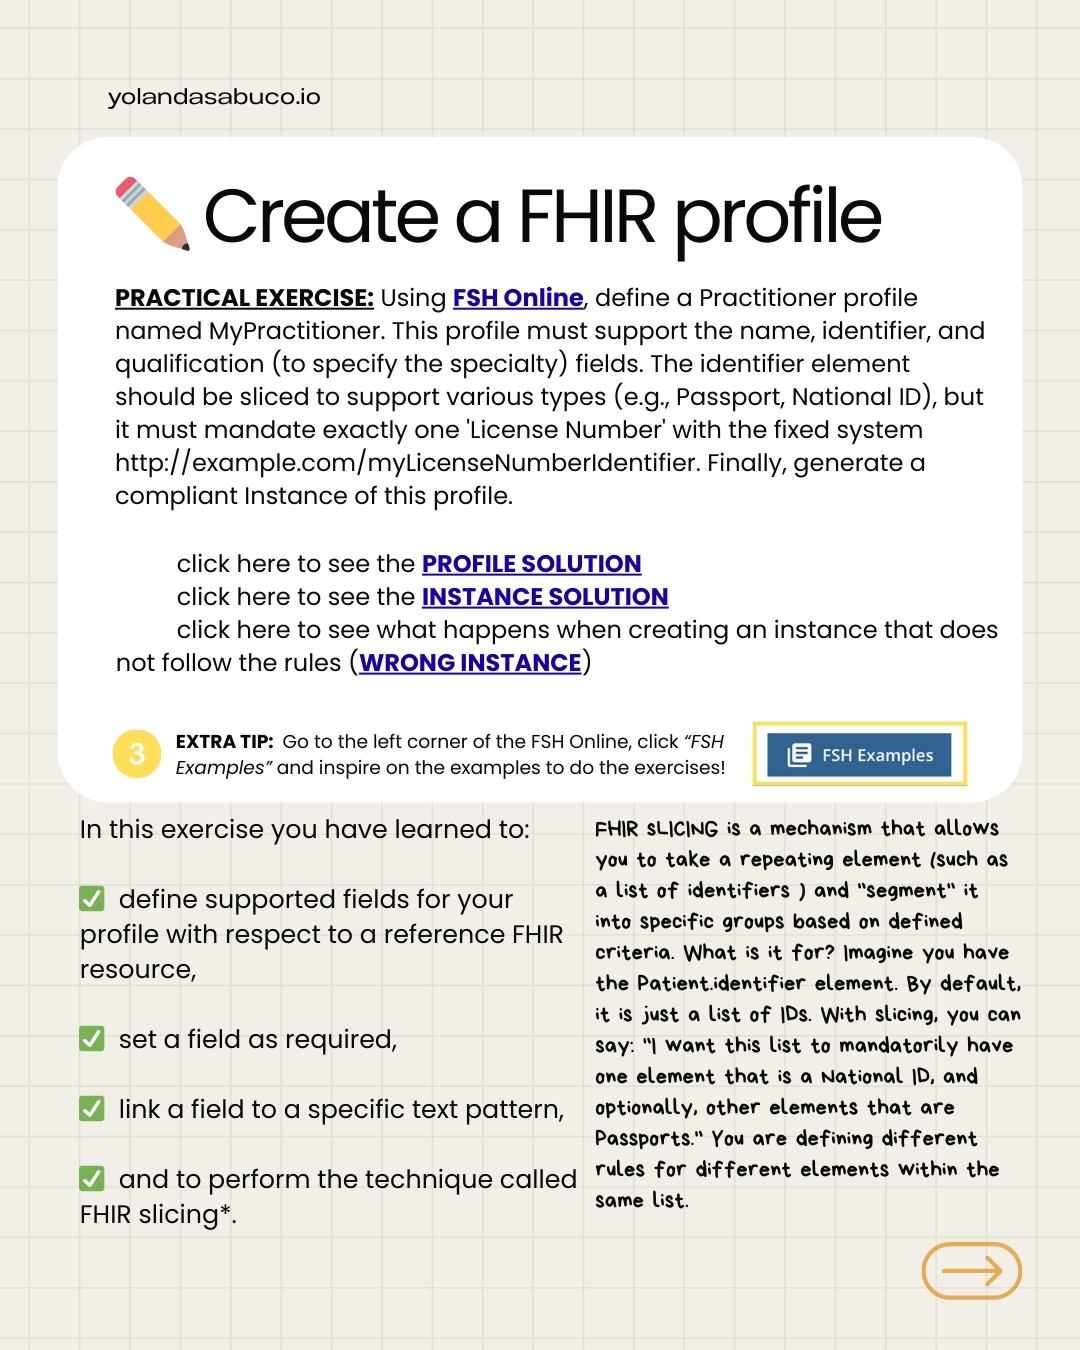
 Create an FHIR profile
Make your FHIR profiles work with terminologies
PRACTICAL EXERCISE
Using FSHOnline, create an FHIR value set with the following SNOMED codes (system = http://snomed.info/sct):
- 394579002 “Cardiology”
- 394588006 “Pediatric oncology”
- 394593009 “Medical oncology”
Bind your new value set to the field qualification in the required mode.
Finally, generate a compliant instance of this profile.
 Click here to see the PROFILE SOLUTION
 Click here to see the INSTANCE SOLUTION
 Click here to see a WRONG INSTANCE, i.e. what happens when an instance does not follow the rules
 Do not panic!
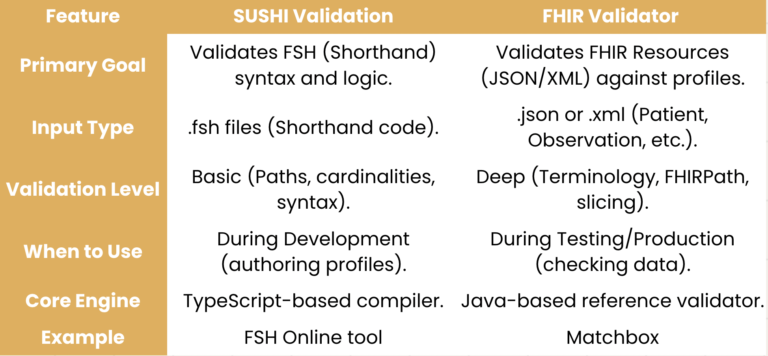
Even though you are using a code that doesn’t exist in SNOMED CT and isn’t included in your value set, FHIR Online Tool doesn’t complain. Why? Because you need the FHIR validator to perform terminology validation rather than sushi.
You can see an example of a validation in Matchbox where a code is used that exists neither in SNOMED CT nor in the required value set.
PRACTICAL EXERCISE
Using FSHOnline, create a FHIR extension where I can place the years of experience of the Practitioner. Finally, generate a compliant Instance of this profile.
click here to see the PROFILE SOLUTION
click here to see the INSTANCE SOLUTION
Think through the creation of new profiles and extensions before your start. Someone might have had the same use case before you! See also: the full registry of FHIR extensions
In this exercise, you have learned to:
- Create an extension
- Link the extension to a specified FHIR profile
- Reuse extensions
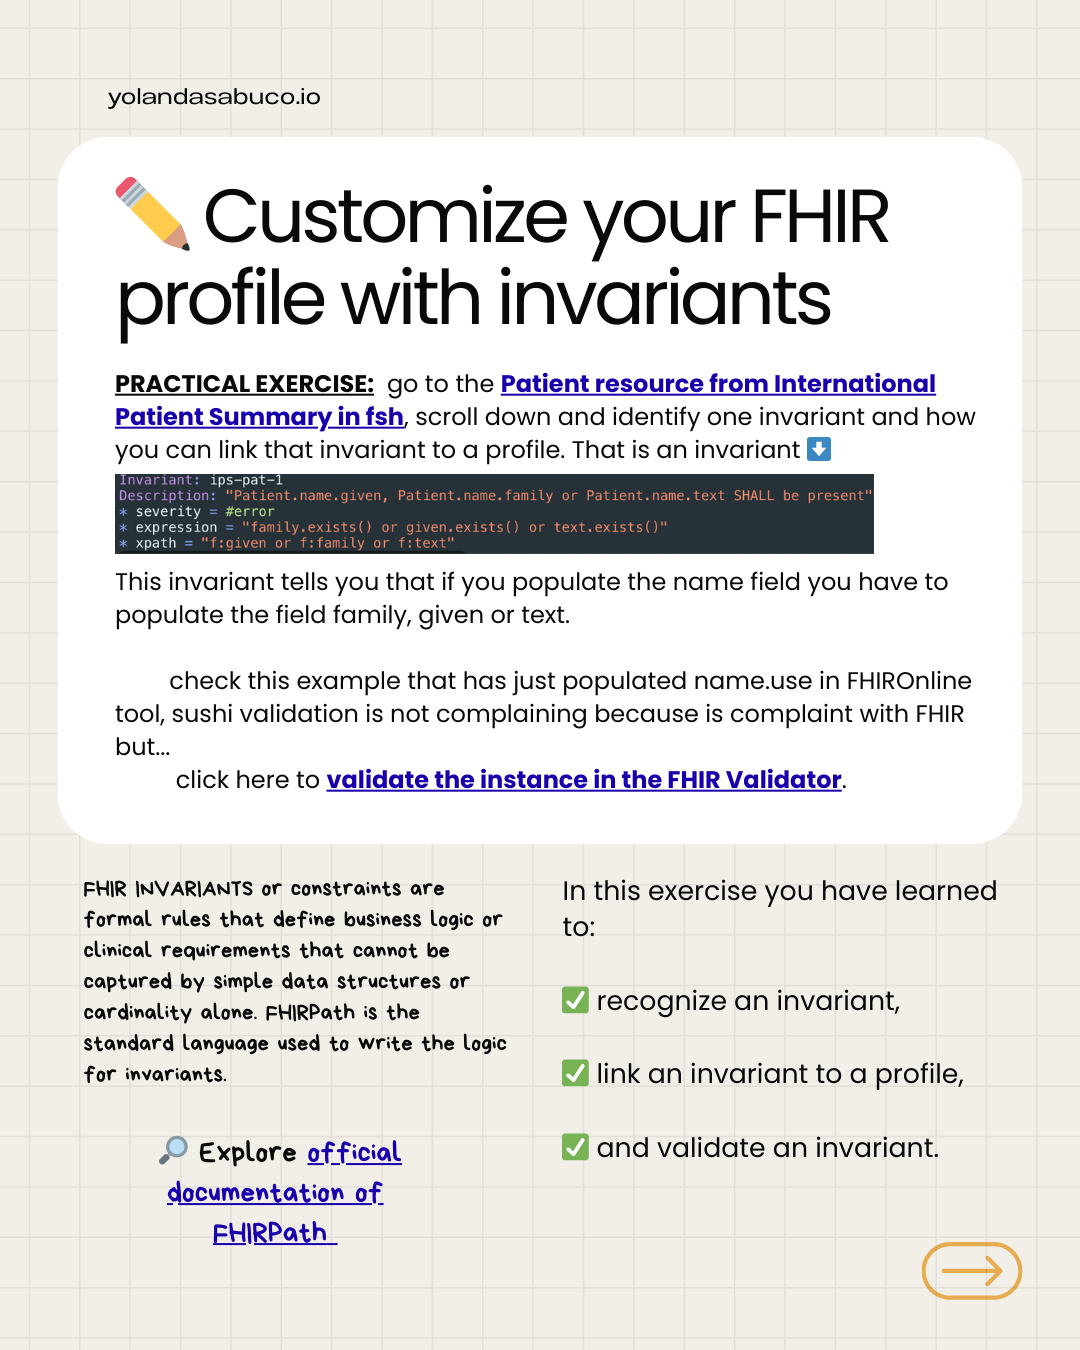
PRACTICAL EXERCISE
Go to the Patient resource in the International Patient Summary in .fsh, scroll down, and identify one invariant and how you can link that invariant to a profile. The image below shows an invariant.
This invariant tells you that if you populate the name field you have to populate the field family, given, or text.
Check this example that has just populated name.use in the FHIROnline tool, sushi validation is not complaining because it is compliant with FHIR, but…click here to validate the instance in the FHIR Validator.
FHIR INVARIANTS or constraints are formal rules that define business logic or clinical requirements that cannot be captured by simple data structures or cardinality alone. FHIRPath is the standard language for writing the logic for invariants.
Explore the official documentation of FHIRPath.
In this exercise, you have learned to:
- Recognize an invariant
- Link an invariant to a profile
- Validate an invariant